Showing posts with label Holiday. Show all posts

Monday, November 10, 2014

Dang Tasty Pumpkin Cookies, Gluten Free

Pin It
Dang Tasty Pumpkin Cookies

     I made these delicious cookies weeks ago, however my blog hasn't been working properly so I couldn't put them up...super annoying!! The Pin button still isn't working properly, but we're working on that, it will pin for you at least(thank goodness).  
    When I first saw this recipe I thought hey, why not, it has cream cheese frosting on them, lets try!  I can honestly say my family is very tired of Pumpkin treats at my house, there is actual complaining going on...Seriously, who complains about a dessert??!!  So firstly, let me say these are probably some of THE BEST COOKIES I've eaten in an age!!  I don't like Pumpkin cookies, so this is saying a lot...it's not my recipe, so I can say this, and not be bragging!  I might have eaten about 6 or 8 I stopped counting, they are small and just so easy to eat.  
     So, if your family doesn't love Pumpkin Pie, then why not try Pumpkin cookies, these cookies are a winner!! I hope you have a great Holiday Season, and Happy Baking, Natalie


     If you want you cookies to be perfectly round, and the exact same size, buy a cookie scoop.  Mine are not perfect, nor are they round, it was messy to make, but possible.  I did however run out and buy a cookie scoop right after.  Much of our dough is very sticky, and I was tired of having sticky hands all of the time!!

Ingredients-
adapted from, The Girl Who ate Everything
-1 cup softened butter
-1 cup sugar
-1 cup pumpkin puree
-1 1/2 tsp baking soda
-1 1/2 tsp baking powder
-1/4 tsp salt
-1/2 tsp cinnamon
-1/2 tsp ginger
-1 large egg
-1 tsp vanilla extract
-2 1/4 cups Pamela's bread flour mix
For  cream cheese frosting-
-4 oz cream cheese (room temp)
-1/4 cup butter
-I think I used 2 cups powdered sugar ( so do it to your taste)
-1/2 tsp vanilla 

How to-
Preheat the oven to 350 degrees, spray the pan with Pam spray.  Bake for 15-17 minutes.  Cool, then remove from the pan.
-First beat the butter and sugar together until fluffy, then add the pumpkin and mix in.
-Next add the soda, baking powder, salt, cinnamon, ginger and vanilla and mix well.
-Then add in your egg and beat in.
-Lastly add in your flour a little at a time, until combined.  Make sure and scrape the sides down.  
-Now make your cookies, try and make them small and roundish, then bake. 

After your cookies cool, then frost them with the cream cheese frosting, a nice thick layer and enjoy!!


     This is one of my new favorite things, a cookie scoop...they come in all different sizes and they are not created equal.  Some are much better quality then others, try one, you may never go back to sticky fingers either! :)


Oxo Cookie Scoop

Sunday, October 19, 2014

Gluten Free Pumpkin Roll Bars

Pin It


Pumpkin Roll Bars

     I have decided to make an entire months worth of posts, all about Pumpkin.  I honestly don't know of anyone who doesn't love the smell of a pumpkin dessert baking in their home, the combination of smells are fantastic...Ginger, Cinnamon, Pumpkin and Cloves, I can smell it now. 
      The greatest thing about Fall season means Apples are coming off the trees, so no more nasty store bought apples, the weeds are slowing down in my yard (except this year,it's not cold enough yet!) I get to go pick my pumpkins and decorate ASAP for Halloween!!!! I love Halloween, seeing the kids in costumes, the Fall food and I get to crack out my cuter clothes.......the neighbors I'm sure are tired of my t-shirts, shorts and flip flops EVERYDAY!!! 
     My husband calls Fall, butter season, because when I'm stuck in the house I bake 10 times more and blow through the butter(we all know how cheap being GF is to start with! NOT).  I love to try new soup recipes and desserts,I can share with my friends and family.  I hope you all enjoy my month of Pumpkin.
 Happy Baking, Natalie 

Ingredients-
Adapted from The Recipe Critic
-6 TB butter melted (not bubbly)
-1 1/2 cups sugar
-2 cups Pumpkin
-2 large eggs
-1 tsp vanilla
-1/2 tsp Ginger
-1 tsp Cinnamon (1/2 tsp more if you love it)
-2 tsp Baking Soda
-1 1/2 tsp Baking Powder
-2 cups Pamela's bread flour mix
For filling-
-8 oz. cream cheese softened(room temp)
-1/4 c. sugar
-1/2 tsp vanilla
-1 large egg

How to-
Use a 9x13 inch glass pan, spray it with Pam spray.  Preheat oven to 350 degrees, bake for 50-55 min, check the cake with a toothpick all the way in.  Also, if you press on the cake and it springs back you should be good.
-First add the wet ingredients and mix until they are all smooth, about 2 minutes.
-Next put all of your dry ingredients into a separate bowl and mix together, then slowly add into the wet ingredients and mix well.
-Then in a separate bowl, mix together your filling with a hand mixer and set aside.
*-Now that  you have everything made SPREAD 2/3* of the batter into the pan, save the rest, then spread your cream layer as evenly as possible on the batter layer.
*-Lastly use the rest of your batter and in spoonfuls, plop the pumpkin batter over the cream cheese randomly, then run a butter knife through the top to make swirls. 
-Cool these bars, then put in the fridge. Mine lasted 5 days in the fridge covered.

This company is one of my Favorite!!! Boomchickapop
http://angiespopcorn.com/ They have the greatest varieties of popcorn and I especially love the Peppermint, with chocolate drizzle it is to die for!!  Try it, you'll love her popcorn!


Monday, October 13, 2014

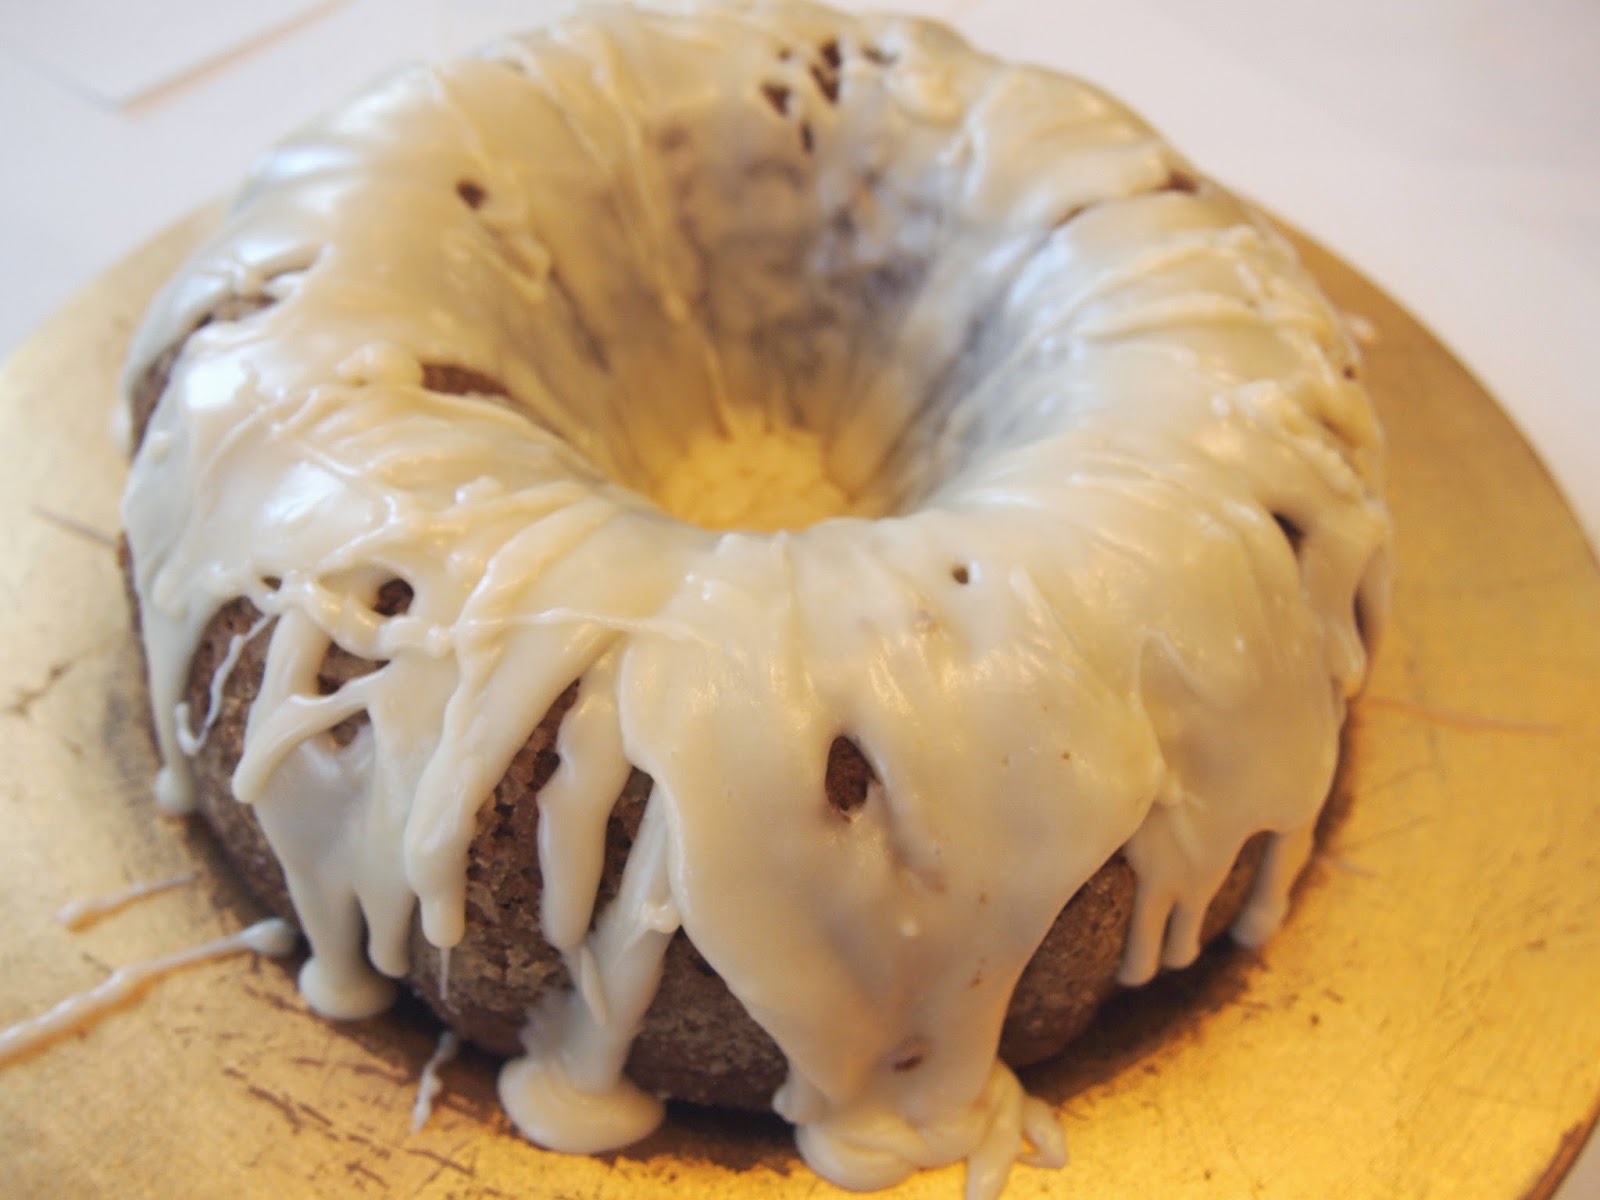
Gluten Free Pumpkin Buttermilk Bundt Cake

Pin It


             Pumpkin Buttermilk Bundt Cake
    
     So, this last weekend I attended the Gluten Free Expo in our area, it's always great to see and taste the new products that are being developed each year.  This year was a bonus, I was able to take my newly diagnosed niece with myself, and my good sport of a daughter.  Some things are still super nasty tasting, and others just get better tasting all the time; I really do feel bad for the poor people who were diagnosed years and years ago! Thank goodness(and sadly)  Celiacs and gluten intolerance have become much more common and talked about!!  If you are able to attend a Gluten Free Expo in your area, go, you'll be happy you did!
     Now onto this most delicious cake...so I was scouring Pinterest as usual, and I decided it was time to master a Bundt Cake!  Thanksgiving and Christmas are both coming up soon, and I know a lot of people really don't like Pumpkin Pie (also not my favorite) and we GF must supply desserts for these up coming Holiday events; who said you have to have a pie?!  If you are like me and don't love pie, try this cake, IT IS TO DIE FOR!!!! I took it to my Bunko group, and didn't tell anyone I made it, everyone asked who made the DELICIOUS cake!  I was so excited when I got to tell everyone it was me!!   Try this the Brown Butter Icing, it will have you licking the plate!! 
              Happy Baking, Natalie


Ingredients:
Adapted from The Baker Chick
-3/4 softened butter
-3/4 sugar
-1/2 cup brown sugar
-1 tsp vanilla
-3 large eggs
-1 1/4 cup canned pumpkin
-3/4 cup Buttermilk
-1/4 tsp Cloves
-2 tsp Cinnamon ( I used 1 1/2 tsp)
-2 1/4 cups Pamela's Bread Flour mix
-2 tsp Baking soda
-2 tsp Baking powder

Browned Butter Icing ingredients-
-1/2 cup butter
-2 cups powdered sugar
-2 tsp vanilla
-2-4 tsp milk


How to:
-First mix all of the dry ingredients in a separate bowl and set aside.
-Next in a mixer or large bowl, add your butter, sugar and brown sugar and beat until fluffy. 
-Then add your vanilla, eggs, pumpkin, buttermilk and mix on medium until they are all incorporated and smooth, then scrape the sides .
-Lastly add in the dry mixture slowly until it is all mixed in, and the flour is not visible. 
For the icing-
-In a sauce pan add the butter and turn it to medium, stir until it starts to lightly brown. Turn off the heat.
- Next add the vanilla, stir in the powdered sugar, then add milk as needed. 
-Now add to the cake while the icing is WARM, then serve and enjoy!!!

     Preheat oven 350 degrees, spray with Pam, then I dusted mine with flour too. Use a 10 inch Bundt pan. Spread it out evenly in the pan. Bake on the center rack for 60-63 min, or until a toothpick comes out clean. I cooled mine on a cooling rack for a hour, then tipped it out. 

***These are some of my VERY favorite treats in the world!!! I know shocking, I don't just eat dessert...I eat savory foods too!! Asian food is my most favorite of any food, and these are so good, I have to fight my 14 yr. old Gluten eating son for these!!! ***


Monday, January 27, 2014

Gluten Free Red Velvet Brownie Bites

Pin It


                        Red Velvet Brownie Bites

     I just noticed that I have been baking with a theme, RED, well I had no Valentine desserts to share until I started baking these.  There are a lot of Holidays you really don't need to make a dessert for, but this is one that you can't ignore.  I had pinned this on Pinterest a while ago and decided, this would be perfect for a party or any place you needed to share with a group; plus for a bonus it had my favorite ingredient in it CHOCOLATE!!!!  These are easy to make, taste delicious and look so great on a platter! 
     Now if you have been following me, I wanted to share how my Cruise to the Caribbean was and show some pictures.  We took a big family cruise on The Holland America, Nieuw Amsterdam  to the Eastern Caribbean.  This was my 2nd Cruise since being diagnosed with Celiacs, it was a good experience!!


This is the beautiful island of Turks and Caicos, the beach was GORGEOUS, white sands and warm turquoise waters!  My idea of heaven!

     The meals were excellent, try not to notice I had two Lobster tails!  I had alerted the ship and staff to my food allergy when  I booked us , then I made fast friends with our server and the Head Sui Chef on the Lido deck, so that if there was anything I questioned or needed they knew who I was, and took such EXCELLENT care of me!!

     This beautiful landscape is on the lawn of El Moro Fort in Puerto Rico,  this was amazing to visit!  We have been to Puerto Rico twice, and I loved it just as much the second time if not more....it's a Vacation for the eyes and the people are so kind and welcoming!


     The desserts on the ship are mostly pre-made by Kinnikinnick, their bread and pasta is also the same.  I'm not a fan of pre-made desserts so, I tried one, then asked one night if they had any Flourless Chocolate Cakes, and low and behold this little beauty showed up at dinner the next night! YESSS...this was so wonderful!! So, I asked for it the next night and had 2, because I had been on Dessert rations( I put myself on) this was so good, I would have skipped dinner and just had the cake!


     This is Half Moon Cay, Holland America's Private Island, they feed you there, it's awesome.  They were very careful, not one time on the cruise did I ever get contaminated!!  There was a Caribbean party one night late, and I was very sad that I would just get to sit and watch everyone eat, because I had missed dinner.  They found me a great fish dinner, and my friend the Sui Chef saw me BEFORE  the party and asked if he could get me some desserts from the back, it really made my night and made me feel included in the festivities!!  My family was so jealous of me for once!


I hope this helps you to feel hopeful about venturing out, and traveling.  Happy Baking, Natalie


Ingredients-
Adapted from, tasteandtellblog.com
-1 cup butter softened
-1 cup sugar
-1 1/2 tsp pure vanilla extract
-1/2 cup cocoa(I use dark, so the red doesn't show up in the pic well)
-1/8 tsp salt
-1 TBS red food coloring
-1 TBS Buttermilk
-2 large eggs
-1 1/4 cups Pamela's Bread flour mix

 Cream Cheese Frosting-
-4oz room temp Cream Cheese
-1/4 cup butter softened
-1 cup powdered sugar
-1/4 tsp vanilla

To make-bowl and big spoon
-put the butter in a sauce pot or a microwave safe bowl, I used the bowl, melt the butter(not boiling, just melted) then add the sugar and stir into the butter.
-Next add the vanilla, cocoa, salt, food coloring and buttermilk. stir them all together.
-Lastly add the eggs, then carefully fold in the flour, just make sure you have no flour left on the edges.  It is a pretty thick batter.


Preheat the oven 350 degrees. Spray the pans with Pam spray. There are 2 options, either you can make mini sized or regular muffin sized.  If you want to do Mini size, then use a 1TB measuring spoon, exactly.  If you want a regular sized muffin pan, then use 2 TBS in the pan.  They both bake for 13 min.  Let them cool for a few minutes, then poke a small indent into the middle of them, so you can fill it with the Cream Cheese Frosting later.
    Whichever size you do, they taste awesome but you get more if you do the mini's...I'm not exactly sure how many because I had to throw a bunch away in the trail and error period! I'm thinking 36.


These are a few of my favorite things this week! Family


My nephew's Jake and Matt and my niece Kortney
My little family, who aren't so little anymore!

Brayden and Brooklyn, the two biggest cheeses!


Friday, January 17, 2014

Gluten Free Red Velvet Cookies

Pin It
                             Red Velvet Cookies

     I was on a nightly Pinterest cruise, when I came across this recipe, I love cookies, and I thought how GREAT would this be for a child who has a School Valentine's Day party!?  These fun cookies can be made the day before, wrapped up in cellophane and tied with a cute ribbon; then every little child will feel that their treat is just as good (if not better ) as the store bought treats all of the other children will be eating for the party!
     I am always looking for desserts that make an impact, when I'm asked to bring a dessert.  I have found, that I won over my nieces and nephew's, by having foods that look pretty, and fun to eat....the better it looks the less they care if it's GF or not, they just want to TRY it; once I get them trying things they will ask when I'm making my next dessert and they don't care what is in it, this is when I know I am doing something right!!  I have made some really ugly but tasty desserts, the poor neighbors and family get them.  My only GOAL is to make desserts that I hope people like, and to make baking easy and enjoyable for all of us again. 
      Someday, being Gluten Free won't make us seem like Circus Freaks, and we won't have to give a giant explanation at every dinner party and restaurant, until then, I will keep baking and I hope you will too.  Happy Baking, Natalie   


Ingredients:
Adapted from- Eat Cake for Dinner
-1/2 cup butter
-1/3 cup +2 TBS sugar 
-1/3 cup + 2 TBS brown sugar
-1 large egg
-1 tsp Pure Vanilla Extract
-1 TBS red food coloring (I use food gels)
-4 TBS Buttermilk
-1/3 cup cocoa
-1 1/2 tsp baking soda
-1/8 tsp salt
-1/2- 1cup white chocolate chips(depending on what you like, I did a 1/2, but next time I would do 1 cup)
-3 oz. room temperature cream cheese cut into chunks
-1 1/2 cups +2 TBS Pamela's Bread flour
 
Directions-
-Cream together the butter, sugar and brown sugar until light and fluffy, then add vanilla and red food coloring
-Next add buttermilk, baking soda, salt and cocoa, mix them well and scrape down the sides
-Then add your egg, mix it in, then add the flour and make sure it is all mixed well, scrape the sides bottom.
-Lastly add the Vanilla chips, mix, then at the very end add the cream cheese chunks a piece or two at a time and mix lightly, then add more and repeat.  (you want a little cream cheese to show) 

Bake in a 375 degree oven, for 10-12 min, this makes about 28.   Make sure and spray your pan with Pam, I found the cookies to have a nice crisp edge and a soft chewy middle.  If you like a crispier cookie, bake for 12-13 minutes.  They stayed fresh for 4 days in a sealed container, they didn't last any longer, they were eaten.  

Here is my favorite thing this week, but actually always! I made these cookies, the same time as the Nutella Cheesecake! AUUHHH, this has not been good for my waist line, lets just say I helped eat both, and I couldn't give it away FAST enough!!  I'll just keep working it off, so I can keep eating Dessert! :-)
 

Monday, December 23, 2013

Gluten Free Sprtiz Cookies

Pin It
                                 Spritz Cookies

     Oh Christmas cookies, let me count the ways I love thee!!!  I especially love Spritz Cookies, my mom would always make these every Christmas, by the pounds; I remember coming home from school and I could smell the hint of almond in the house, I knew heaven was waiting within my grimy little hands!  Spritz cookies just remind of my mom, and childhood, there is nothing better  to stir up a memory then food.  So this year I decided to make some myself and share my little piece of heaven with a few of my friends.
     I did however find, you do need a Spritz cookie press...which I don't own and I had to one borrow from my mom, so I need to get one of my very own.  Her cookie press was made circa 1973 and is electric, but man it works like a champ, SERIOUSLY!!  There is a little bit of a learning curve with the press, so the first few got tossed back into the batter, or in my case, my husband tossed them in his mouth, so no cookies were wasted in the making of these tasty treats.  Just make sure and press down on the pan, make them often, share with your friends because with a double batch I made about 100 cookies!   Happy Holidays and Happy Baking, Natalie


 Ingredients:Adapted from Betty Crocker's Cookie Book
-3/4 cup sugar
-1 cup butter softened
-2 1/4 cup Pamela's Bread Flour
-1/8 tsp salt (or none, I prefer none)
-1/4 tsp Pure Almond extract
-1 large egg
-whatever food coloring you would like for each batch, and colored sugar.

 
How to-
-Mix together the butter and the sugar until fluffy.
-Next add salt, almond, egg and mix, scape down the sides.
-Now add the flour and food coloring and mix until incorporated well.
-Then load up your cookie press and go to town.


 Bake at 375 degrees for 8 min,  if you want them crispy bake for 10.  Do not spray the pan or the cookies will not stick on the pan when you press them on, there is plenty of butter in the recipe, it won't stick.  Cool for a couple of minutes and eat baby eat!


 I dare you to try and eat just one, my son and nephew probably had 25 a piece! Then they asked if they were Gluten Free! Yesss!